
Taking a picture, then finding that the results are too light, washed out, and details are lost can be disheartening. This is called “overexposure”, which occurs when too much light falls onto the camera sensor and thus causes segments of the image to become devoid of texture, natural colors, and contrast. Many photographers – particularly those just starting out – tend to take overexposed photos whenever they’re photographing outdoors under bright sunshine, don’t quite know how to set their cameras properly, or they’re shooting a scene with severe bright highlights.
Learning how to fix overexposed photos helps photographers recover images that may initially appear unusable. In most cases, you can fix overexposed photos by adjusting exposures, restoring highlights, recovering shadow details and doing targeted edits. The fact is whether your photograph can be restored totally relies on how badly it overexposes and how much detail it has. In this post, we will show you why a photograph is overexposed, how to recover it after shooting and how to avoid this problem.
Why Overexposed Photos Fixing Matters
The essence of photography is the management of light. Human eyes do not register brightness the same way a camera does . Because of this, when what seemed like a balanced scene to the naked eye is captured in an image, it might come out too bright or underexposed, resulting in the loss of important features.
Understanding how to fix overexposed photos matters because exposure mistakes are among the most common challenges photographers face. A bright sky, reflective surface, strong sunlight, or incorrect camera setting can quickly affect the final image.
The overexposure problem is clearly demonstrated where detail is completely lost, such as on an outdoor shot of a person, whose face may look too light, the skin tones lost to white and the texture lost. The same applies to a landscape where you may lose detail on the clouds of the sky, which just become a blank white area. Knowing how to correct for this will enable you to save treasured memories and enhance all of your image editing.
Having said that, it is worth noting that editing has its limits. If an area of your image has completely been captured at pure white, there is nothing recorded in that area that any piece of software will ever be able to restore. Editing should be used to rescue information.
What Causes Overexposed Photos?
Before learning how to fix overexposed photos, it helps to understand why overexposure happens in the first place.
Incorrect Exposure Settings
Camera exposure depends mainly on three settings:
- Aperture
- Shutter speed
- ISO
These settings will manage the exposure of the photo. A good example of this will be, a slow shutter speed, taken at bright daylight may bring in a lot of light and create a ” washed out” looking picture. Another would be the highest ISO settings that create a blinding white light when its extremely sunny.
Strong Lighting Conditions
Direct sunlight is one of the biggest causes of overexposure.
Photographers often struggle when shooting:
- Beach scenes
- Snow-covered landscapes
- Bright outdoor portraits
- Reflections from water or glass
Strong highlights can exceed the camera sensor’s ability to capture detail.
Incorrect Camera Metering
New camera systems estimate exposure but not the intent of the photographer. For example, a camera may be able to determine that the scene in front of it is dark. In other words, the camera may expose for the brighter subject and overexpose bright areas like the sky when the brighter subject is against a dark background.
Shooting in Automatic Mode
The beauty of automatic camera settings lies in their ease of use. While handy in many situations, this easy ease does have one major pitfall; the automatic setting can often miscalculate exposure. The photographer using auto settings only can wind up with frustratingly variable results, especially under difficult lighting.
How to Fix Overexposed Photos During Editing
Adjust Exposure and Brightness First
A few more settings in most editing programs… Exposure is one of the very first things to adjust. Lowering the exposure a little can very quickly help make an overexposed photo brighter, or simply bring down an overexposed bright photo. However, exposure alone can sometimes not be sufficient to brighten up a photo, as even with a lowered exposure, there can be other parts of the image still overexposed. The ideal way to approach this kind of situation is a mixture of lowering the exposure and raising the highlight slider.
Recover Highlights
Highlights are the areas of the image that are brightest. This may include sunlight shining through the trees, a brightly colored white shirt or dress, or a very blue sky. Most photo editing software have a highlight slider.
Bringing down the highlights can help recover details that may have been blown out in the brightest part of the image.
In the wedding photo for example, you might want to adjust the highlights down on the bright white wedding dress to recover the texture on the dress without darkening the whole picture too much.
Reduce Whites Carefully
The whites adjustment applies to the brightest parts of an image. Bright whites in a photo could be edited back to restore balance to the photo that feels too bright overall. Lowering the whites can make your image seem gray and washed out when applied excessively, but editors make small adjustments and view their images to see how they look compared to the original.
Adjust Contrast and Shadows
Reducing brightness can sometimes flatten the image and make it lose depth Using slightly more contrast will bring back some of the depth. At the same time it is sometimes advisable to bring up the shadows, in order not to lose all the detail from these parts of the picture. We want a picture which has plenty of detail both in light and dark regions.
Fixing Overexposed Photos in Different Editing Programs
Lightroom Workflow
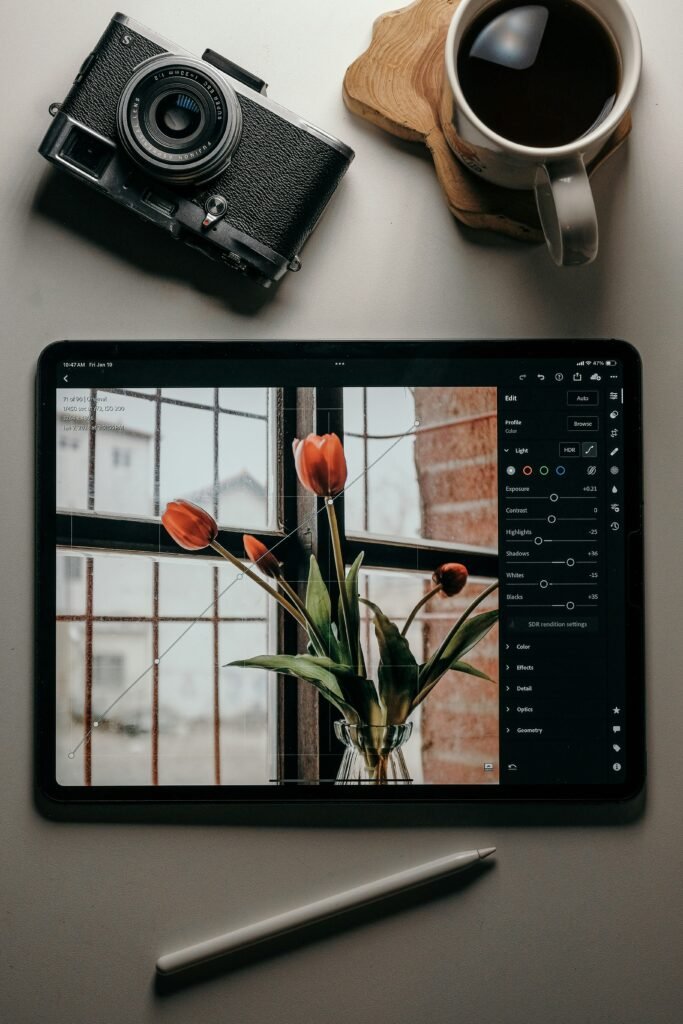
Photographers often rely on Adobe Lightroom because it offers very precise exposure control.
A typical Lightroom correction process includes:
- Lowering exposure slightly
- Reducing highlights
- Adjusting whites
- Increasing contrast if needed
- Correcting colors
- Applying final detail adjustments
One advantage of Lightroom is that edits are usually non-destructive, meaning the original image remains unchanged.
Photoshop Adjustments
Photoshop provides more advanced control.
Photographers can use:
- Camera Raw filters
- Adjustment layers
- Curves
- Levels
- Masking tools
For example, if only the sky is overexposed but the subject looks correct, selective editing allows the photographer to fix only the affected area.
Mobile Photo Editing
Many smartphone editing apps now provide professional-level adjustments.
Common tools include:
- Exposure slider
- Highlights control
- Shadows adjustment
- Contrast
- Temperature
- Saturation
Mobile editing is useful for quick improvements, although desktop software usually provides more detailed control.
How to Fix Overexposed Photos Taken on a Phone
Smartphone cameras automatically adjust exposure, but difficult lighting conditions can still create problems.
To improve phone photos:

Tap to Control Exposure
Most smartphone cameras allow users to tap the screen and adjust brightness manually.
If the image appears too bright, lowering exposure before taking the photo can prevent overexposure.
Use HDR Mode When Appropriate
HDR combines multiple exposures to capture more detail in bright and dark areas.
It can help with scenes containing strong contrast, such as:
- Landscapes
- Sunsets
- Buildings against bright skies
However, HDR is not always ideal for moving subjects because multiple exposures can create unwanted effects.
Common Mistakes When Fixing Overexposed Photos
Making the Entire Image Too Dark
A common beginner mistake is lowering exposure too much.
The result may remove brightness but create an unnatural-looking photo.
Good editing is about balance, not simply making everything darker.
Increasing Contrast Too Much
High contrast may make an image appear dramatic, but excessive contrast can destroy subtle details.
Professional editing usually focuses on maintaining natural tones.
Ignoring Color Changes
Exposure adjustments can affect colors.
For example, reducing brightness may make skin tones look unnatural or reduce the warmth of a sunset.
Color correction should be part of the editing process.
Overusing Editing Filters
Strong filters may hide exposure problems temporarily but often reduce image quality.
Natural corrections usually produce better results.
Expert Tips for Better Exposure Control
Check the Histogram
Check the Histogram to understand whether your image is properly exposed, and learning How to Read a Camera Histogram can help prevent overexposed photos before you press the shutter.
When pro photographers use a camera’s histogram, it is to tell them something about their exposure. It is basically how bright everything in the frame is across the range. If the whole bar is bunched up on the far right side, then it might be too bright. Understanding this can tell a photographer when it’s time to just press the shutter.
Shoot in RAW Format
Shoot in RAW Format because RAW Image File Format preserves significantly more image data than JPEG, making it much easier to recover highlights and adjust exposure during editing.
Since RAWs have more image data then their compressed counterparts JPEGs, photographers will find that recovering highlights has more wiggle room in RAW files. When shooting the critical photo, take RAW for expanded editing options.
Use Exposure Compensation
1. In some automatic camera settings exposure compensation offers the photographer a means of manually controlling the brightness of their shot. For instance a negative exposure compensation can sometimes help when shooting in extremely bright sunlight to stop the brightest areas from becoming overexposed and losing detail.
Real-Life Example: Recovering an Overexposed Outdoor Portrait
In the afternoon sun, a photographer takes this picture of a friend. The face looked fine, but the sky in the background was blown out to white, and some of the clothing lost its texture.Instead of getting rid of the picture, he opened the RAW file in photo editing software.
Bring down the highlights and adjust exposure a bit. A slight adjustment to the sky area and the photo became normal again. It is not exactly the same as a well-exposed original, but it recovered the details sufficiently to make the photograph acceptable.
This example shows why understanding how to fix overexposed photos is valuable for photographers who work in unpredictable lighting.
Troubleshooting Overexposed Photo Problems
The Photo Is Completely White
If large areas contain pure white pixels with no detail, recovery options are limited.
Editing can improve overall appearance, but missing information cannot be recreated.
The Subject Looks Too Bright but the Background Is Fine
Most of the times requires a selective editing approach. In instead of trying to edit all the image at once, use a mask or local adjustments to edit just the part you want.
Colors Look Washed Out After Fixing Exposure
Overexposure often reduces color intensity.
After correcting brightness, adjust:
- Saturation
- Vibrance
- White balance
carefully to restore natural color.
The Photo Looks Flat After Correction
Reducing exposure can sometimes remove depth.
Small adjustments to contrast, clarity, or curves may help restore dimension.
Before and After Comparison: Overexposed vs Corrected Image
An overexposed photo typically has:
- Lost highlight details
- Weak colors
- Low contrast
- Bright areas without texture
A corrected image usually has:
- More balanced brightness
- Improved details
- Natural colors
- Better separation between highlights and shadows
The goal is not creating a darker image. The goal is restoring realistic light balance.
Final Thoughts
Learning how to fix overexposed photos is an essential skill for photographers because exposure mistakes can happen in almost any shooting situation. Whether the problem comes from harsh sunlight, incorrect camera settings, or automatic exposure decisions, careful editing can often improve the final result.
This is definitely the best way, combining exposure adjustments with highlight recoveries and retaining natural colors while resisting the temptation of too heavy editing, as well as trying to improve our camera technique and reading the histogram. That will help us not to overexpose in the first place by learning to shoot in RAW and exposure control.
Frequently Asked Questions
Can overexposed photos be fixed completely?
It depends on the level of overexposure. If image details are still recorded, editing can recover much of the information. Completely white areas cannot usually be restored.
What is the easiest way to fix an overexposed photo?
Reducing exposure and highlights is often the first step. More advanced corrections may require selective adjustments and color balancing.
Can I fix overexposed photos on my phone?
Yes. Many mobile editing apps include exposure, highlights, contrast, and color adjustment tools.
Why do my photos become overexposed in sunlight?
Bright environments can exceed your camera sensor’s ability to capture light, especially when exposure settings are not adjusted correctly.
Is RAW better than JPEG for fixing exposure problems?
RAW files usually contain more information, making them easier to adjust during editing compared with compressed JPEG files.
Can Photoshop restore completely lost details?
No software can recreate details that were never captured. Photoshop can enhance existing information but cannot recover completely missing data.